
Navigating Navigation Part 1: Getting set up for trail riding navigation
- Aug 13
- 4 min read
The tools you need - and why navigation is more than just following a line

Trail riding is often portrayed as simply finding a route and following a GPX file. In reality, responsible route planning involves understanding mapping, legislation, terrain, local information and having the experience to know when a route is appropriate.
One of the most frequent questions asked by trail riders is “How do you manage the navigation?” In times gone by, we relied on a paper Ordnance Survey (OS) Map and signposts to identify byways, plus local knowledge about where we could ride and what sort of terrain to expect. Exploring a new area on the bike often meant a lot of trial and error and flapping of a wet, disintegrating map to gradually piece together a workable route. Of course, the option to plan a route and navigate with a paper map is still there if we want it, but these days we’ve got a lot more options for gathering information about our route in advance and navigating it smoothly.
This four-part series of blogs will take a look at what navigation equipment you need for planning and riding a route, how to check where you can legally ride, tips for planning the route, and what you should be aware of when you first ride your new route.
The hardware
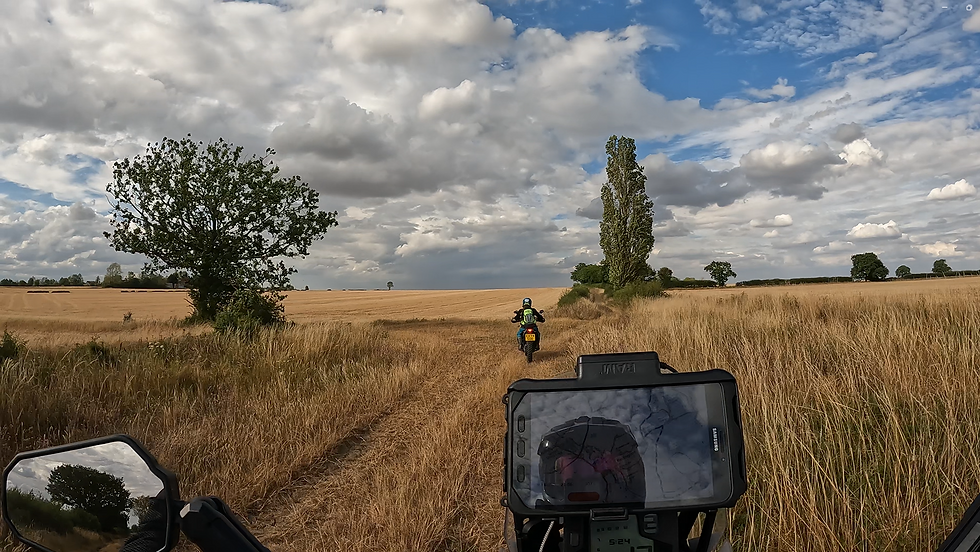
For green laning, most of us use a GPS enabled device running a mapping app on the bike. It could be a purpose-built, off-road motorcycle GPS satnav, designed specifically for the task. They are rugged, waterproof, often thermal and shock resistant, and have specialised software suited to the needs of a motorcyclist going off the beaten path. But they can be pricey.
Another option is a rugged tablet and docking station or heavy-duty mount, often also used to run digital roadbooks for rallies. These have the benefit of a larger screen that’s easier to see at a glance, but need a lot more power to run.
Many of us, especially in the beginning, opt for a smartphone mounted on the handlebars or behind the windscreen. A mobile phone used for off-road navigation gets a hard life – the constant vibration, dust, mud and water, and exposure to heat and cold poses a challenge for delicate electronics. Another issue is the battery drain – the GPS and display screen needs to be on constantly, and mapping software often requires heavy processing power.
We’ve tried several solutions, but the simplest is an old smartphone handset, used only for navigation, in a waterproof holder and plugged into the bike’s USB socket. To avoid issues with dirty connectors, or on a bike without a USB socket, an even better setup is to use a wireless charging phone holder, hardwired into the bike’s electrics. The phone doesn’t even have to have a SIM card if you’re only using it to follow routes downloaded in advance.

The software
Various mapping software is available, including Outdoor Active, OS Maps, OsmAnd and DMD2. Some are subscription services, some offer free versions with various levels of capability as well as a paid version with full features. They all allow you to plan routes then follow them, and they sync your data seamlessly across multiple devices (such as a laptop, tablet and phone). It’s easier to plan a route on a larger screen, then have it sync to your mobile. Routes can be created and then shared by exporting them as a GPX file, a universal mapping file which can be downloaded onto other devices.
One golden rule is to download the route to the mobile device in advance when you’re connected to Wi-Fi rather than relying on mobile network coverage on the day. Many of the rural areas that are good for green lanes are poor for network coverage - so just when you most need the map, you find your route running into a blank area!

Not all software uses the same level of mapping detail. Ordnance Survey 1:25k and 1:50k data requires a paid commercial licence, and some apps have less detailed mapping which doesn’t differentiate legal rights of way. With these, it can be hard to tell if you’re riding in the right places, especially if you need to navigate around an obstacle or closure on the day.
Some software can be set up to provide turn-by-turn navigation instructions, but it can be problematic on non-tarmac routes, so most trail riders visually follow the route on the map.
It can take a while to find a setup that works well on your bike, suits your budget and meets your preferences for mapping software, so take some time to research the options. If you’re a member of a group like the Trail Riders Fellowship (TRF), or take part in a professionally guided trail ride, ask an experienced ride leader or guide if they’ll show you their setup so you can get a hands-on idea of how it might work. Learning to use the software is largely a matter of trying it out and practicing – whatever setup you choose, it gets easier the more familiar you get with it!
In Part 2, we'll look at the types of green roads that make up the UK network and how to find out where it’s legal to ride.
If you want to spend less time setting up and more time riding, our guided rides include all the route planning and navigation, so you can concentrate on enjoying the trails. Visit our About Us page to learn more.

Comments